
깃헙 블로그 설정 - 기능
Summary
제 깃헙 블로그에 추가한 기능 설정 방법을 공유합니다. 계속 추가할 예정입니다.
이 글은 minimal mistakes 테마 기준으로 작성되어 있습니다.
댓글 기능 추가하기 (Disqus 디스커스)
- Disqus 사이트에 들어가서 회원가입과 이메일 인증을 합니다.
- 우측상단의 사람모양 아이콘을 클릭해서 Add Disqus To Site로 갑니다.
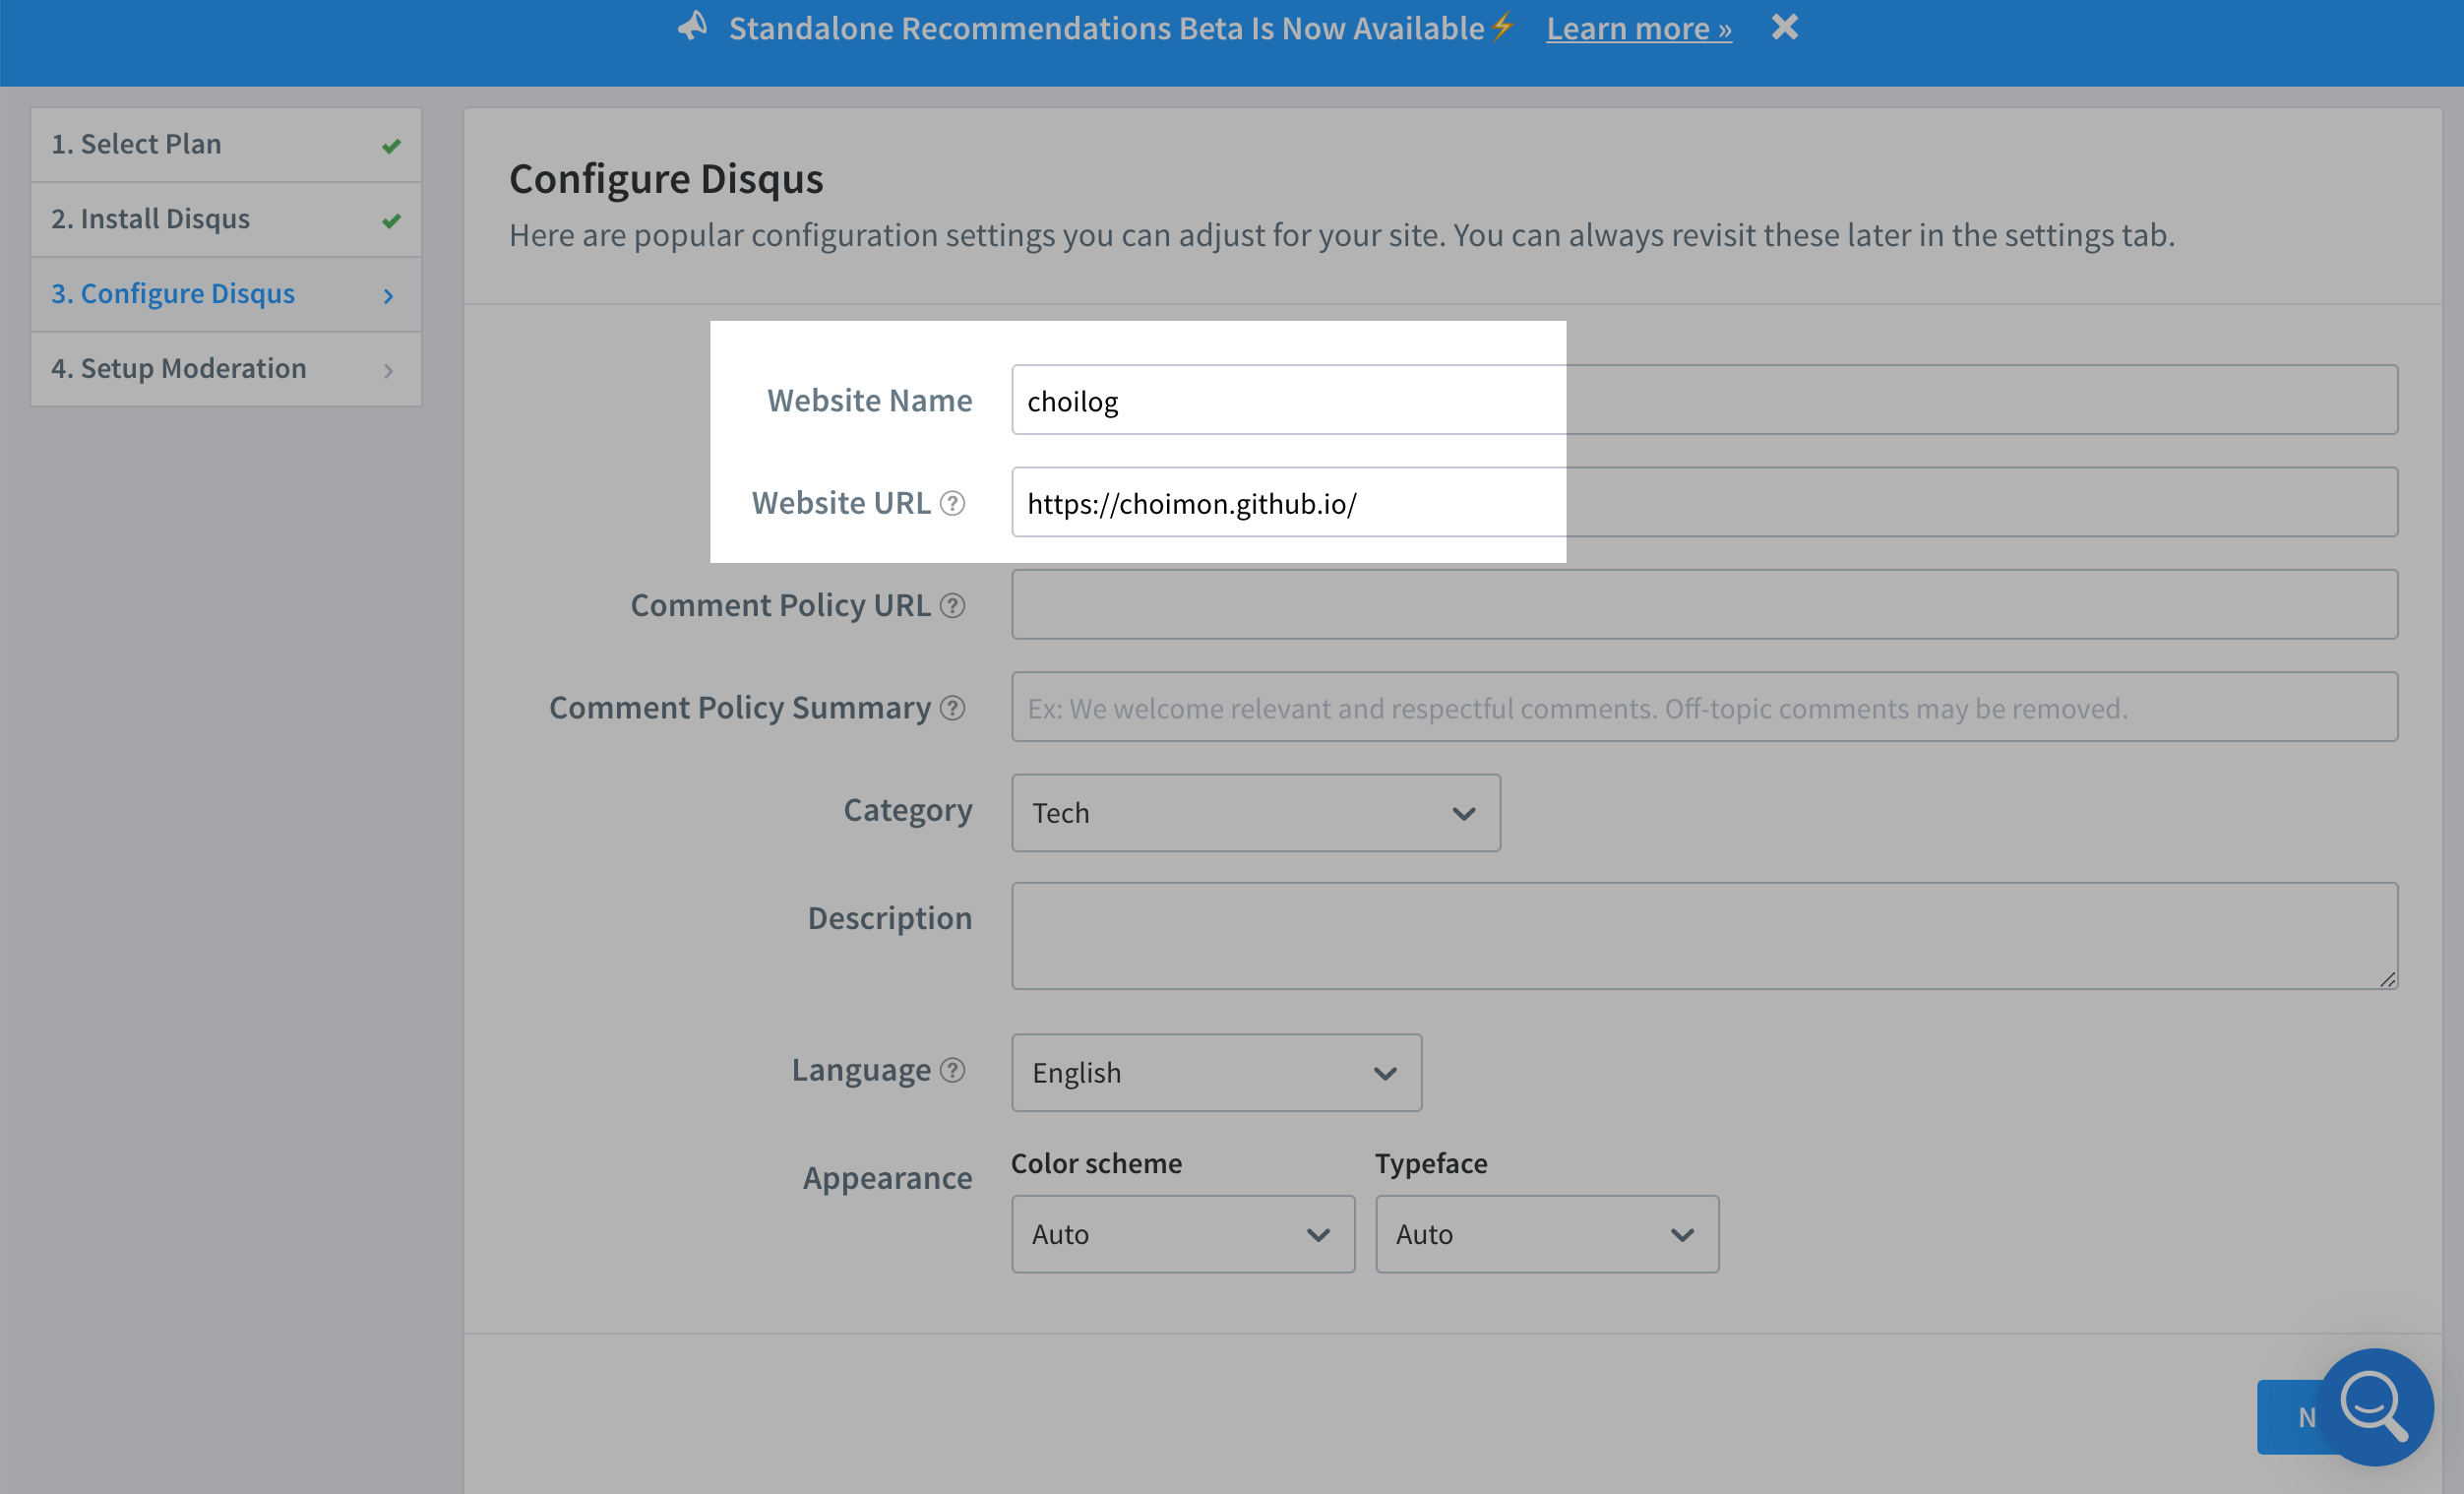
- 댓글을 사용할 사이트(블로그) 정보를 설정합니다.
- I want to install Disqus on my site 클릭합니다
-
_config.yml에서 설정해줍니다
comments: provider: "disqus" disqus: shortname: "choilog" ... # Defaults: default settings for posts defaults: # _posts - scope: ... values: ... comments: true ###### <--- shortname 이란? : Disqus site 에 부여된 유니크한 식별자 입니다. 사이트에 달린 모든 댓글은 shortname이 연결(reference)되어 있습니다.
- shortname은 Disqus admin 페이지에 다음 사진과 같이 확인 할 수 있습니다. 제 shortname 은 “choilog” 입니다.
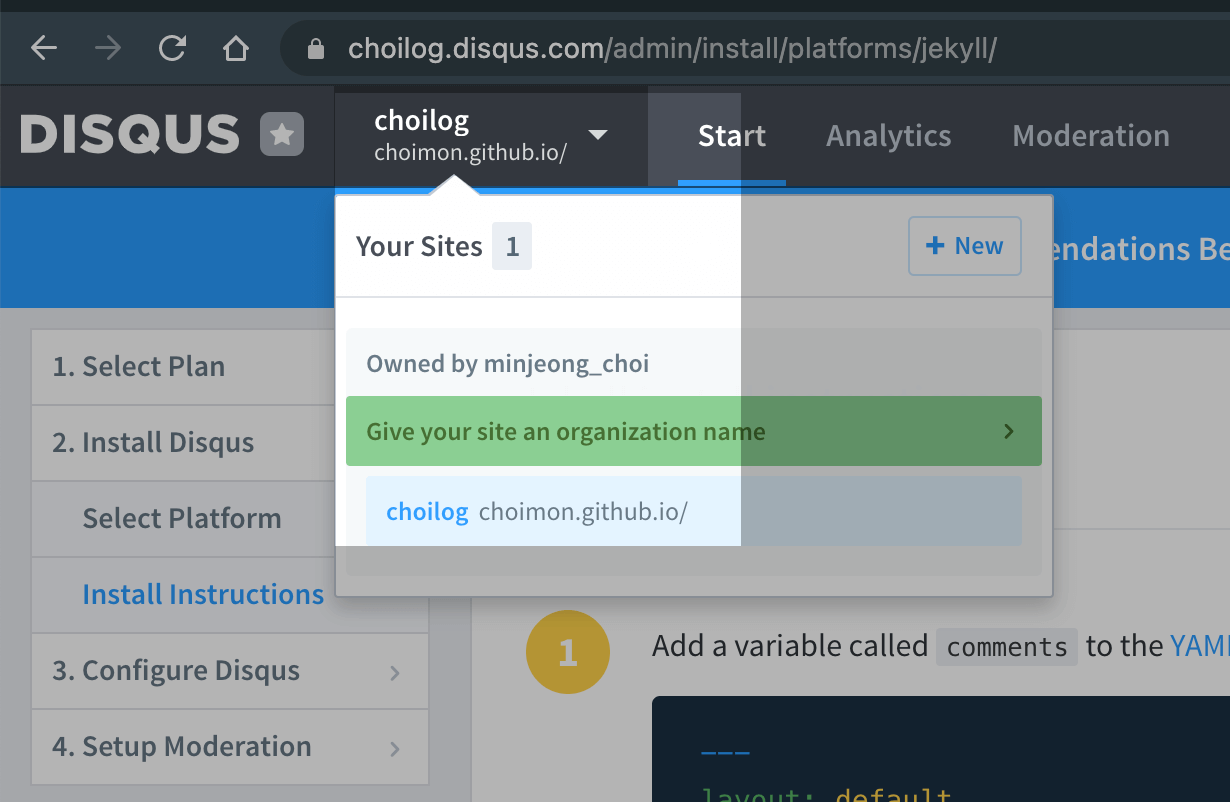
- shortname은 Disqus admin 페이지에 다음 사진과 같이 확인 할 수 있습니다. 제 shortname 은 “choilog” 입니다.
- 모든 포스트가 아니라 특정 포스트에만 댓글 기능을 추가 하고 싶으시다면,
_config.yml에서comments: true부분을 빼고, 원하는 포스트 YAML front matter 에comments: true를 넣어 주세요.--- comments: true ---
- shortname 이란? : Disqus site 에 부여된 유니크한 식별자 입니다. 사이트에 달린 모든 댓글은 shortname이 연결(reference)되어 있습니다.
결과물 입니다! 짠!🥳

추가 설정
Note 다음 설정은 mmistakes를 쓰시는 경우 안 해 주셔도 됩니다.
mmistakes는 아래 추가할 코드를 _includes/comments-providers/disqus.html에 이미 들고 있습니다.
- Install Disqus - Install Instructions 페이지에
Universal Embed Code를 클릭합니다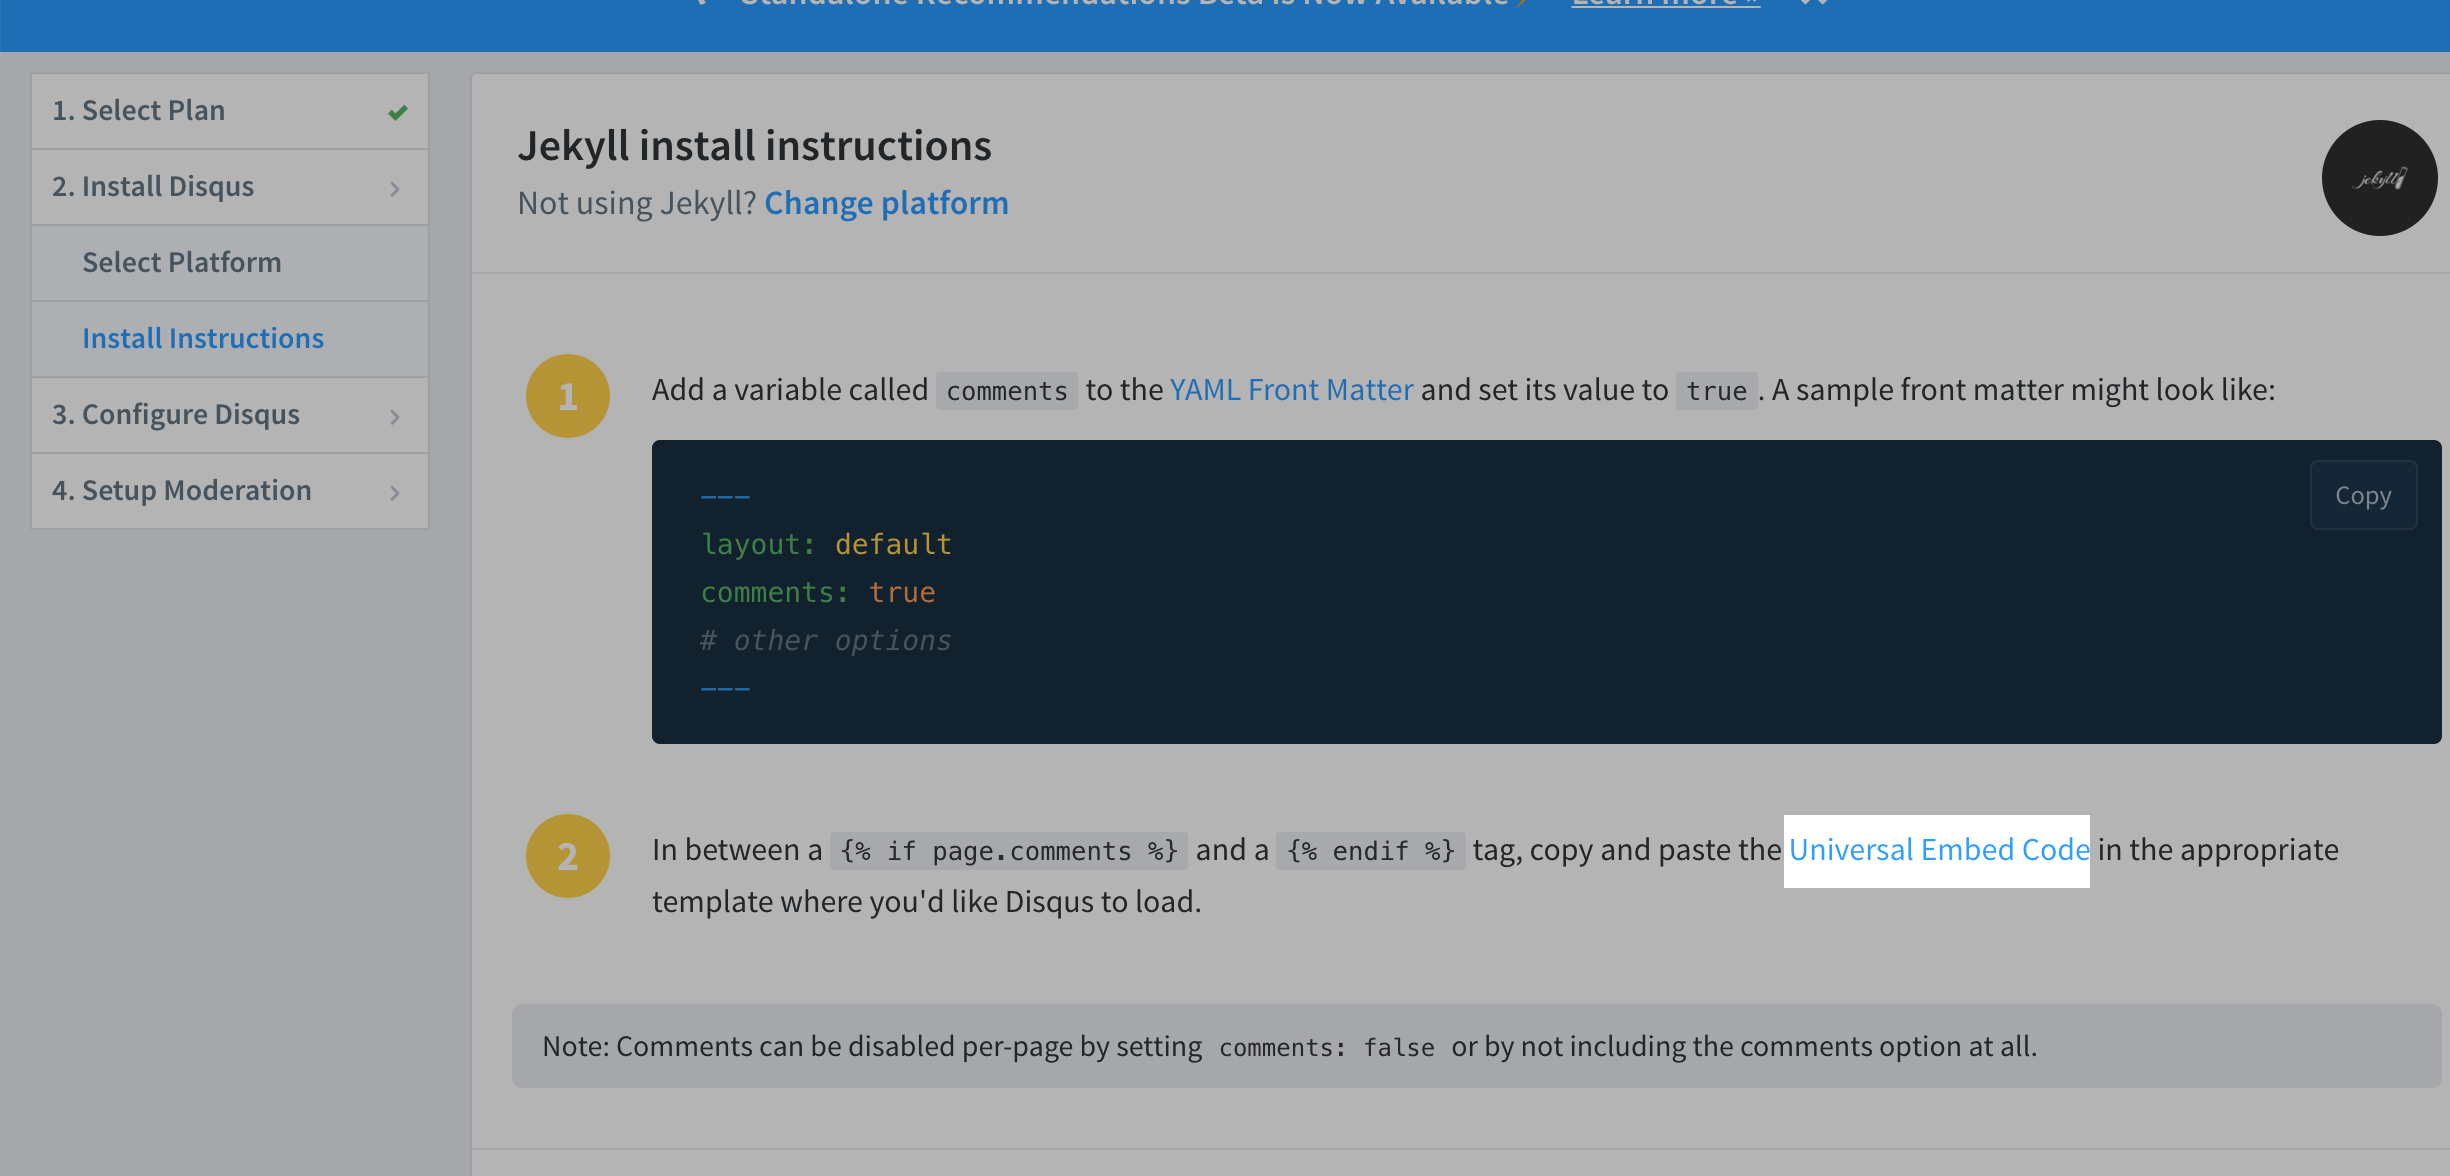
- 클릭한 페이지에서 뜨는 코드를 복사해서
_includes안에disqus_comments.html을 만들 어 줍니다.- 제 코드는 앞 뒤에 {% if page.comments %} … {% endif %}를 넣어줬습니다. 포스트 YAML front matter 에 comments가 true 일 경우에만 댓글을 넣어줄 것입니다.
{% if page.comments %} <div id="disqus_thread"></div> <script> /** * RECOMMENDED CONFIGURATION VARIABLES: EDIT AND UNCOMMENT THE SECTION BELOW TO INSERT DYNAMIC VALUES FROM YOUR PLATFORM OR CMS. * LEARN WHY DEFINING THESE VARIABLES IS IMPORTANT: https://disqus.com/admin/universalcode/#configuration-variables */ var disqus_config = function() { this.page.url = 'https://choimon.github.io{{ page.url }}'; // Replace PAGE_URL with your page's canonical URL variable this.page.identifier = '{{ page.id }}'; // Replace PAGE_IDENTIFIER with your page's unique identifier variable }; (function() { // DON'T EDIT BELOW THIS LINE var d = document, s = d.createElement('script'); s.src = 'https://choilog.disqus.com/embed.js'; s.setAttribute('data-timestamp', +new Date()); (d.head || d.body).appendChild(s); })(); </script> <noscript >Please enable JavaScript to view the <a href="https://disqus.com/?ref_noscript" >comments powered by Disqus.</a ></noscript > {% endif %} -
_layouts 폴더 안 post.html에 다음 코드를 추가합니다.
 <div id="post-disqus" class="container">
   {% include disqus.html %}
 </div>
수학 공식 (latex) 사용하기
MathJax를 사용한 제 블로그 글을 참고해 주시기 바랍니다.
Leave a comment